Window
INFO
Window is currently in beta and will most likely have API changes.
Window is new way to create and manage Minecraft inventory GUIs in both Minestom and Paper. Let's create a reactive window step by step! If you see the final code, you can see it here.
Installing
The repository can be found here
Dependency
- Group: net.bladehunt
- Artifact ID: window-core, window-minestom, window-paper
- Published versions can be found here
Creating a Window
First, let's start off with defining our values with signals. These are covered in depth at the ReaKt page.
val materials = arrayOf(
    Material.WHITE_STAINED_GLASS_PANE,
    Material.LIGHT_GRAY_STAINED_GLASS_PANE,
    Material.GRAY_STAINED_GLASS_PANE
)
val titles = arrayOf(
    "First Example",
    "Second Example",
    "Third Example"
)

val backgroundMaterial = Signal(materials[0])
val navbarMaterial = Signal(materials[1])
val title = Signal(titles[0])
When these values change, our inventory will update reactively. Next, let's start by creating a window with the window DSL.
window(InventoryType.CHEST_6) {
    title { Component.text(title()) }
}
We created it with an InventoryType since creating an Inventory object requires a type. Windows, by default, order objects in Column layout. This behavior can be changed by extending the Window class and copying the same functions in the MinestomWindow class.
Container
Next, let's create a Container. Containers are single-child parents that can be decorated with a background and padding.
window(InventoryType.CHEST_6) {
    title { Component.text(title()) }
    container {
        background { ItemStack.of(backgroundMaterial()) }
        padding { Padding(1, 1, 1, 0, ItemStack.of(Material.BLACK_STAINED_GLASS_PANE)) }
    }
}
Columns and Rows
Inside the Container, we can create a column of rows.
window(InventoryType.CHEST_6) {
    title { Component.text(title()) }
    container {
        background { ItemStack.of(backgroundMaterial()) }
        padding { Padding(1, 1, 1, 0, ItemStack.of(Material.BLACK_STAINED_GLASS_PANE)) }
        column {
            row {
                size = Size2(y = 1)
            }
            row {
                size = Size2(y = 1)
            }
            row {
                size = Size2(y = 1)
            }
        }
    }
}
When we create a new Column or Row, the default size is flex. This is useful to make our sizes fill up spaces, but sometimes, we don't need this. We can use the size parameter of the Column and Row objects to prevent the Y from flexing.
Buttons
Next, in each row, we'll loop through each of our materials and titles to create buttons that set our titles and materials. Buttons have an item and an onClick property. When a property uses the = syntax, it usually means it isn't reactive.
row {
    size = Size2(y = 1)
    materials.forEach { material ->
        button {
            item {
                ItemStack.builder(material)
                    .displayName(Component.text("Change background"))
                    .meta { if (backgroundMaterial() == material) it.enchantment(Enchantment.EFFICIENCY, 1) }
                    .build()
            }
            onClick = {
                backgroundMaterial.value = material
            }
        }
    }
}
row {
    size = Size2(y = 1)
    materials.forEach { material ->
        button {
            item {
                ItemStack.builder(material)
                    .displayName(Component.text("Change navbar"))
                    .meta { if (navbarMaterial() == material) it.enchantment(Enchantment.EFFICIENCY, 1) }
                    .build()
            }
            onClick = {
                navbarMaterial.value = material
            }
        }
    }
}
row {
    size = Size2(y = 1)
    titles.forEach { str ->
        button {
            item {
                ItemStack.builder(Material.BOOK)
                    .displayName(Component.text("Change navbar"))
                    .lore(Component.text(str))
                    .meta { if (title() == str) it.enchantment(Enchantment.EFFICIENCY, 1) }
                    .build()
            }
            onClick = {
                title.value = str
            }
        }
    }
}
Component Library
Finally, let's create a Navbar using the net.bladehunt:window-minestom-components library. This library provides a set of hand crafted components that speed up the development process.
window(InventoryType.CHEST_6) {
title { Component.text(title()) }
container {
background { ItemStack.of(backgroundMaterial()) }
padding { Padding(1, 1, 1, 0, ItemStack.of(Material.BLACK_STAINED_GLASS_PANE)) }
column {
row { .. }
row { .. }
row { .. }
}
}
navbar {
fill { ItemStack.of(navbarMaterial()) }
navItem {
display = {
ItemStack.of(Material.ARROW)
}
}
navItem {
display = {
ItemStack.of(Material.ARROW)
}
}
}
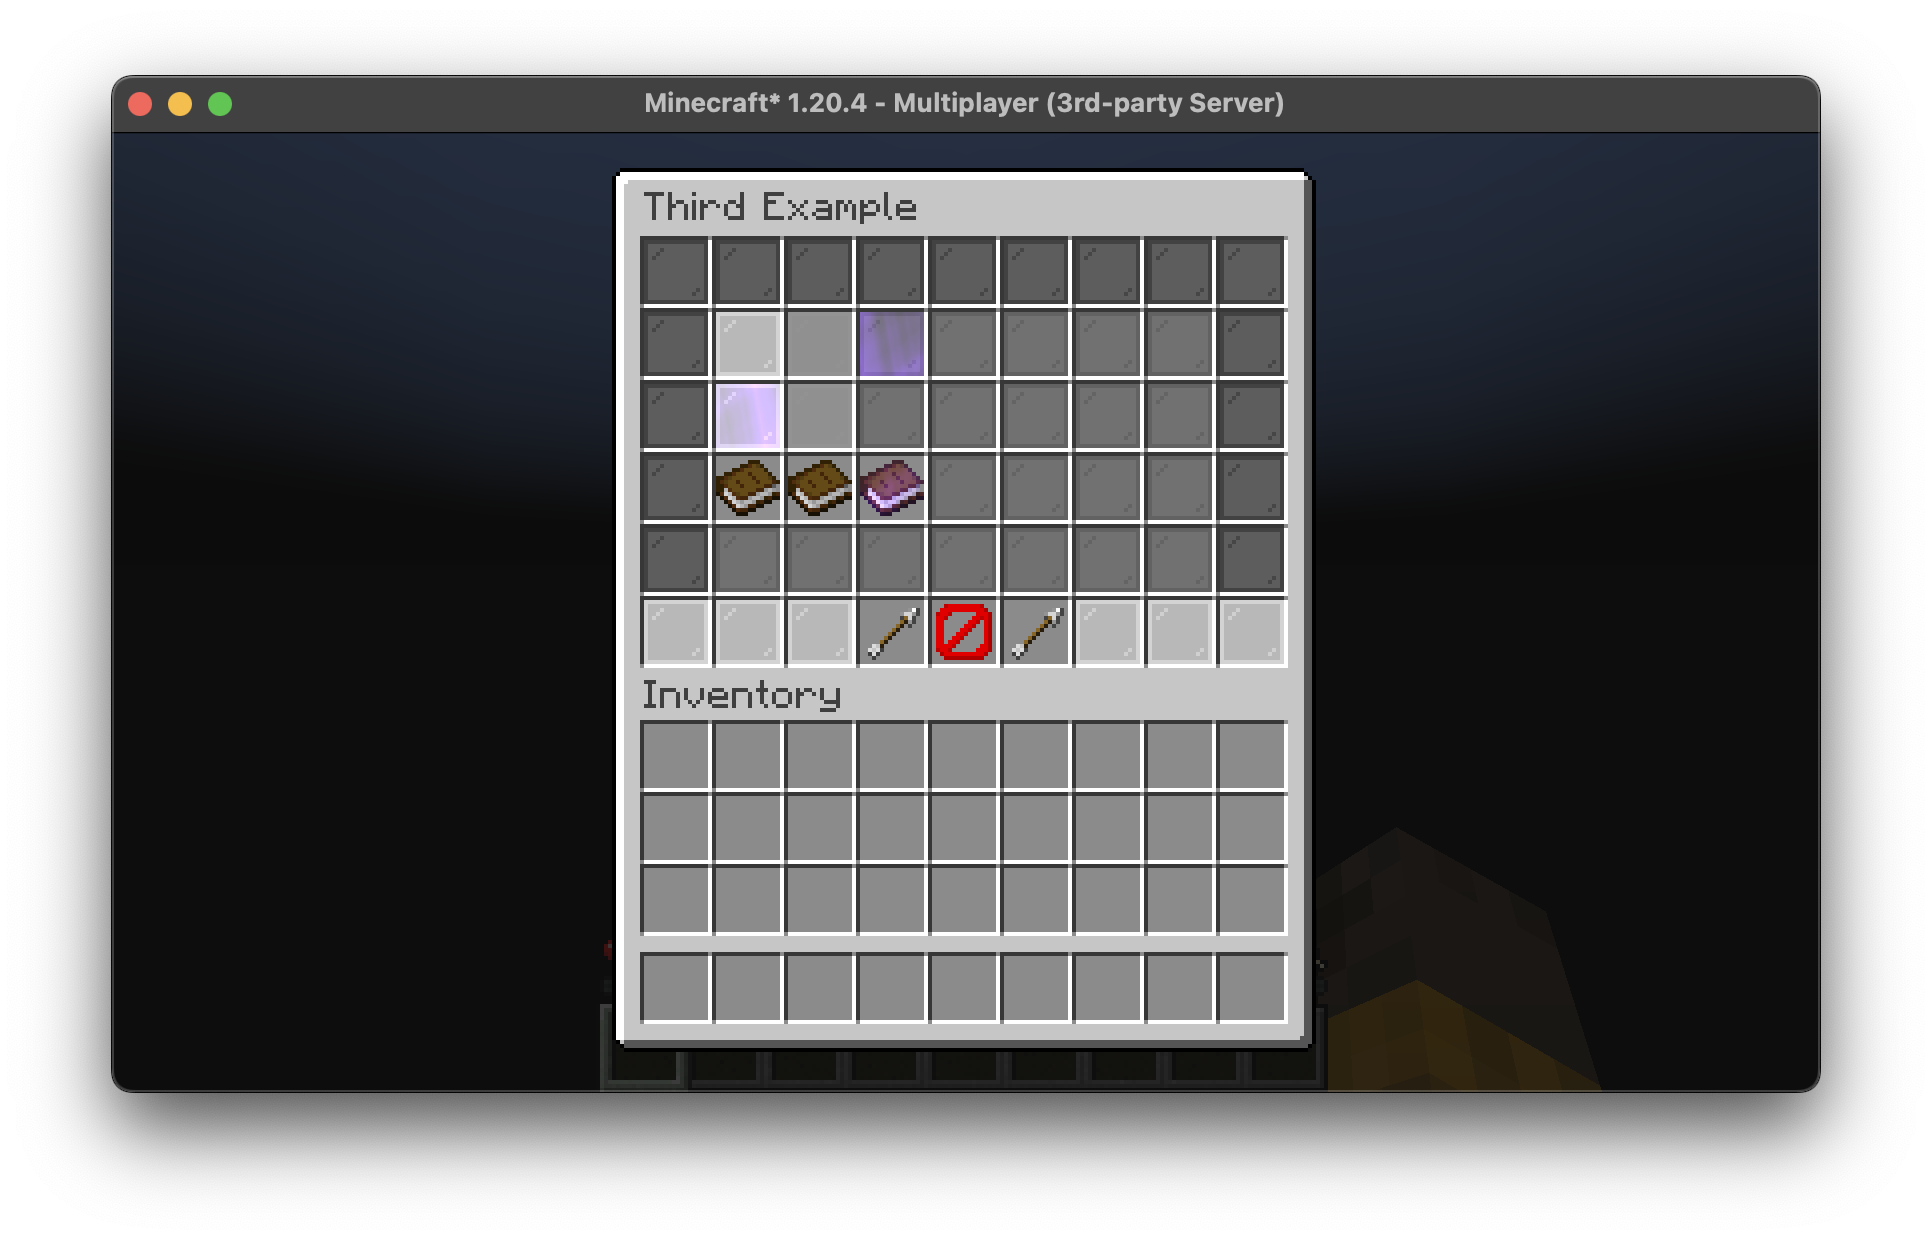
}Final Example
Code
val materials = arrayOf(
    Material.WHITE_STAINED_GLASS_PANE,
    Material.LIGHT_GRAY_STAINED_GLASS_PANE,
    Material.GRAY_STAINED_GLASS_PANE
)
val titles = arrayOf(
    "First Example",
    "Second Example",
    "Third Example"
)

val backgroundMaterial = Signal(materials[0])
val navbarMaterial = Signal(materials[1])
val title = Signal(titles[0])

val win = window(InventoryType.CHEST_6_ROW) {
    title { Component.text(title()) }
    container {
        background { ItemStack.of(backgroundMaterial()) }
        padding { Padding(1, 1, 1, 0, ItemStack.of(Material.BLACK_STAINED_GLASS_PANE)) }
        column {
            row {
                size = Size2(y = 1)
                materials.forEach { material ->
                    button {
                        item {
                            ItemStack.builder(material)
                                .displayName(Component.text("Change background"))
                                .meta { if (backgroundMaterial() == material) it.enchantment(Enchantment.EFFICIENCY, 1) }
                                .build()
                        }
                        onClick = {
                            backgroundMaterial.value = material
                        }
                    }
                }
            }
            row {
                size = Size2(y = 1)
                materials.forEach { material ->
                    button {
                        item {
                            ItemStack.builder(material)
                                .displayName(Component.text("Change navbar"))
                                .meta { if (navbarMaterial() == material) it.enchantment(Enchantment.EFFICIENCY, 1) }
                                .build()
                        }
                        onClick = {
                            navbarMaterial.value = material
                        }
                    }
                }
            }
            row {
                size = Size2(y = 1)
                titles.forEach { str ->
                    button {
                        item {
                            ItemStack.builder(Material.BOOK)
                                .displayName(Component.text("Change navbar"))
                                .lore(Component.text(str))
                                .meta { if (title() == str) it.enchantment(Enchantment.EFFICIENCY, 1) }
                                .build()
                        }
                        onClick = {
                            title.value = str
                        }
                    }
                }
            }
        }
    }
    navbar {
        fill { ItemStack.of(navbarMaterial()) }
        navItem {
            display = {
                ItemStack.of(Material.ARROW)
            }
        }
        navItem {
            display = {
                ItemStack.of(Material.ARROW)
            }
        }
    }
}
Minecraft
This is what it looks like without clicking on anything 
After clicking on a few buttons, you can see it change.